A Teacher Embroidery Design From a Maker's Perspective
When I first opened the Teacher Teaching Line Art file, I wasn't looking at a digital product. I was looking at a potential project. My mind immediately went to the tote bag waiting on my worktable, a custom order from a client who wanted a meaningful gift for her child's first-grade teacher. That's the lens I bring to every embroidery design review: how will this actually translate from screen to stitches, and will the finished product carry the sentiment it's meant to?
The Quiet Confidence of a Single Line
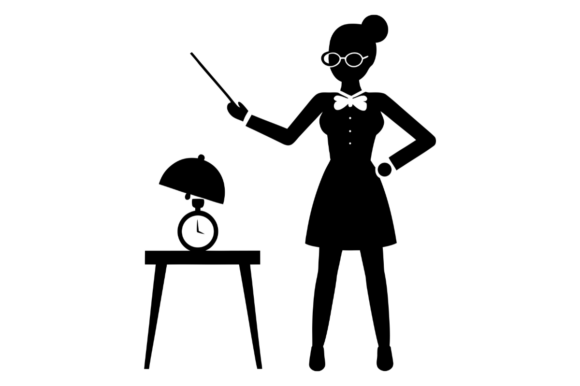
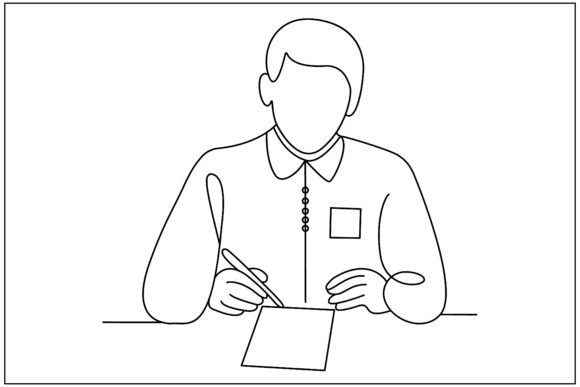
The mood here is unmistakable: it's respectful, warm, and classic. This isn't a cartoon or a busy, colorful scene. It's line art, which means its personality comes from its shape and simplicity. The figure has a gentle, engaged posture—the kind that evokes a patient explainer rather than a stern lecturer. For embroidery, this is a fantastic starting point. A design that relies on outlines gives us, as makers, a lot of control. We can let the silhouette speak for itself with a single running stitch or satin stitch outline, or we can get creative with fill stitches inside the forms to add weight and color.
Where This Design Naturally Belongs
My first instinct was apparel and bags. This Teacher Teaching Line Art has a scalable quality that makes it versatile. On a sweatshirt or a denim jacket, it feels like a badge of honor—a subtle, wearable tribute. On a canvas tote bag or a linen apron, it becomes a functional, personalized statement perfect for a teacher's daily use. I also visualized it immediately on a tea towel or a pillow cover for a classroom-themed nursery or a "teacher's corner" in a home. The lack of overly fine detail means it can adapt to different scales without losing its core recognition.
For small business owners and Etsy sellers, this is a strong embroidery file for building a product line. Think of a "Thank You Teacher" collection: the same elegant design applied to a patch, a cap, a baby blanket, and a kitchen towel. It creates brand consistency across your shop. As a personalized gift—perhaps with a name or date added underneath—it carries a handmade presentation that feels considered and professional, which builds customer trust.
The Real-Life Stitching Scenario: A Tote Bag Test
Let's walk through my mental process for that custom tote. The fabric is a mid-weight canvas. The design's continuous lines are a plus; there aren't tiny, isolated dots or hairline details that might get lost on a slightly textured fabric. However, the pose has some closed spaces—like between the arm and the body—that I'd pay attention to. On a machine embroidery design, depending on the actual stitch density, those areas could become quite dense. For a tote bag that will be used and washed, a very dense stitch area can feel stiff. My practical note here is always to test on a scrap of the same fabric first. This allows you to check the stitch density, see how the lines flow, and decide if you need to adjust the size.
Color contrast is another key consideration. This line art, in its pure form, is likely intended for a single color. On light fabric, a classic navy, black, or burgundy thread would look sharp and academic. On dark fabric—like a black sweatshirt—you'd need a very bright, opaque thread (think a crisp white or a bright yellow) to ensure the design pops with clarity. I always advise running a simple black-and-white digital mockup first to judge the contrast purely on form, then play with thread color ideas.
Spaces Where a Gentle Caution is Wise
While versatile, any line art design has boundaries. I would be careful using this on very small hoop sizes for items like delicate baby clothes or a small patch. If scaled down too much, the essential lines might merge, and the teaching pose could become a indistinct shape. Similarly, on highly stretchy or thin fabrics (like a fine t-shirt), the stability of the lines depends heavily on your stabilizer choice. A good, tear-away or cutaway stabilizer is non-negotiable here to keep those clean lines from distorting.
For curved surfaces like caps, the design's rectangular, vertical orientation might need slight repositioning to fit the curve gracefully. And for products destined for frequent washing—like kitchen towels or aprons—using a robust thread and considering a slightly simpler outline stitch over a complex fill can enhance longevity. The visual appeal isn't just about the first stitch; it's about how it holds up after the tenth wash.
Beyond the Stitches: The Value It Adds to Your Work
What I appreciate about this Teacher Teaching Line Art is its giftability and recognition. It depicts a universal concept without being generic. A customer browsing your handmade shop or seeing your craft fair booth will instantly understand the product's purpose. That immediate recognition speeds up buyer engagement. For creative entrepreneurs selling digital files, this design serves as a solid, adaptable design asset for creating printable mockups or for other crafters to use in their commercial embroidery projects.
From a professional standpoint, using a design with this clear, respectful theme elevates your product out of the "cute" category into the "meaningful" category. It suggests that you, as the maker, understand the need for a gift that honors a profession. That builds a connection with your customer. Whether you're embroidering it for a direct client or stocking it as merchandise in your small shop, the design carries an inherent value that justifies the handmade price point.
Final Practical Notes Before You Hoop It
My review always ends with a checklist. For this design, based on its description as an illustration for multiple uses, I would emphasize:
- Always confirm the actual licensing terms for any embroidery file before selling finished items or digital products. Does it allow for commercial use?
- Check the specific file formats included in the ZIP to ensure compatibility with your machine.
- Inspect the design on your software at various hoop sizes. Look closely at any potential small corners or tight angles that might require stitch adjustment.
- Plan your thread colors with the end fabric in mind. A mockup on both a light and dark background digital image is a fast, free way to preview.
- Remember that line art is wonderfully forgiving. If a section seems too dense for your chosen product, you have the artistic license to simplify it slightly—perhaps converting a fill area to an outline. That's the beauty of working as an embroidery designer; the file is a blueprint, and your expertise brings it to life.
The Teacher Teaching Line Art is more than a graphic. It's a prompt for a project. It asks you to consider who it's for, what it will live on, and how it will be used. That's the kind of design that sustains a craft business and delights a recipient. With some practical forethought on fabric, scale, and stitch application, it can become a standout piece in your embroidery portfolio, from a simple patch to a heartfelt, custom-apparel gift.